Jupyter on Kebnekaise
Since the JupyterLab will only be accessible from within HPC2N’s domain, it is by far easiest to do this from inside ThinLinc, so this is highly recommended. You can find information about using ThinLinc at HPC2N in the ThinLinc section.
At HPC2N, you currently need to start JupyterLab on a specific compute node. To do that you need a submit file and inside that you load the JupyterLab module and its prerequisites (and possibly other Python modules if you need them - more about that later).
Note
HPC2N and most other HPC centers in Sweden use modules to handle their software. You can read more about modules in the modules section.
Thus, the steps to start JupyterLab at HPC2N is:
- Load JupyterLab and its prerequisites.
- Create a batch submit file for running a compute node as server for JupyterLab.
- Wait for the job to start.
- Check the slurm-JOBID.out file for the url where JupyterLab is being served.
- Open the url in a browser inside the HPC2N domain (ThinLinc).
- You can now work in the JupyterLab for as long as the job is running (the walltime you asked for in the batch submit file).
This way it is possible to run a JupyterLab with own-installed Python packages, modified kernel, Julia, R, etc. See examples later in this tutorial.
To see the currently available versions of JupyterLab, do:
You then do this to check how to load a specific version:
which will give you a list of any prerequisites that should be loaded first.
Useful flags to Jupyter
You can use Jupyter --help and Jupyter lab --help to see extra options.
- lab: This launches JupyterLab computational environment for Jupyter.
- --no-browser: Prevent the opening of the default url in the browser.
- --ip=<IP address>: The IP address the JupyterLab server will listen on. Default is ‘localhost’. It is recommended to use $(hostname) to get the content of the environment variable for the hostname for the node you are allocated by the batch job.
Note
Again, remember that the JupyterLab is only accessible from within the HPC2N domain, so it is easiest to work from inside ThinLinc.
Simple example
This is a simple example of starting JupyterLab version 3.2.8 at HPC2N.
Example
- Start ThinLinc (stand-alone client strongly recommended here) and login to the Kebnekaise ThinLinc login node:
kebnekaise-tl.hpc2n.umu.se. - Check which version of
JupyterLabyou will run and which prerequisites it has. Here we will useJupyterLab/3.2.8, which has the prerequisiteGCC/10.3.0. - Make the submit file. Something like the file below will work. Remember to change the project id, how many cores you need, and how long you want the JupyterLab to be available:
#!/bin/bash # Here you should put your own project id #SBATCH -A hpc2nXXXX-YYY # This example asks for 1 core #SBATCH -n 1 # Ask for a suitable amount of time. Remember, this is the time the Jupyter notebook will be available! HHH:MM:SS. #SBATCH --time=05:00:00 # Clear the environment from any previously loaded modules module purge > /dev/null 2>&1 # Load the module environment suitable for the job module load GCC/10.3.0 JupyterLab/3.2.8 # Start JupyterLab jupyter lab --no-browser --ip $(hostname) - Submit the above submit file. Here I am calling it
MyJupyterLab.sh. sbatch MyJupyterLab.sh- Wait for the job to get resources allocated and start running.
- Get the URL from the Slurm output file (as default named
slurm-JOBID.out). When the job has resources allocated, the Slurm output file will have a number of URLs inside at the bottom. - Grab the URL with the hostname since the localhost one requires you to login to the compute node and so will not work!
- The file will look similar to this:
b-an01 [~]$ cat slurm-22422626.out [I 2023-05-11 15:06:23.597 ServerApp] jupyterlab | extension was successfully linked. [I 2023-05-11 15:06:23.756 LabApp] JupyterLab extension loaded from /hpc2n/eb/software/JupyterLab/3.2.8-GCCcore-10.3.0/lib/python3.9/site-packages/jupyterlab [I 2023-05-11 15:06:23.756 LabApp] JupyterLab application directory is /cvmfs/ebsw.hpc2n.umu.se/amd64_ubuntu2004_bdw/software/JupyterLab/3.2.8-GCCcore-10.3.0/share/jupyter/lab [I 2023-05-11 15:06:23.760 ServerApp] jupyterlab | extension was successfully loaded. [I 2023-05-11 15:06:23.761 ServerApp] Serving notebooks from local directory: /pfs/stor10/users/home/b/bbrydsoe [I 2023-05-11 15:06:23.761 ServerApp] Jupyter Server 1.13.4 is running at: [I 2023-05-11 15:06:23.761 ServerApp] http://b-cn0232.hpc2n.umu.se:8888/lab?token=4e369c85f797f7de0c4e15723af75e93ad6bbe7cba11ae59 [I 2023-05-11 15:06:23.761 ServerApp] or http://127.0.0.1:8888/lab?token=4e369c85f797f7de0c4e15723af75e93ad6bbe7cba11ae59 [I 2023-05-11 15:06:23.761 ServerApp] Use Control-C to stop this server and shut down all kernels (twice to skip confirmation). [C 2023-05-11 15:06:23.778 ServerApp] To access the server, open this file in a browser: file:///pfs/stor10/users/home/b/bbrydsoe/.local/share/jupyter/runtime/jpserver-173465-open.html Or copy and paste one of these URLs: http://b-cn0232.hpc2n.umu.se:8888/lab?token=4e369c85f797f7de0c4e15723af75e93ad6bbe7cba11ae59 or http://127.0.0.1:8888/lab?token=4e369c85f797f7de0c4e15723af75e93ad6bbe7cba11ae59 - In this case you should use this one:
- Start a webbrowser within HPC2N (ThinLinc interface). Put in the URL you grabbed, including the token:
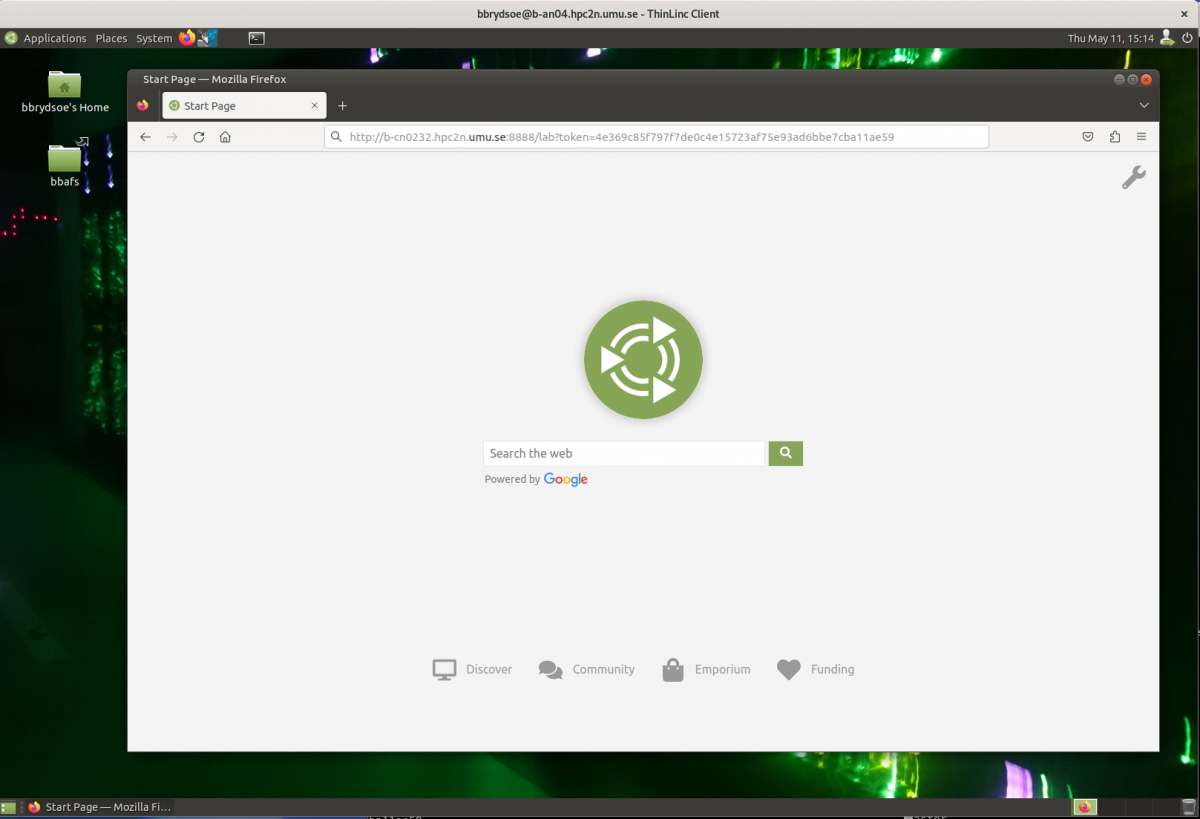
- After a few moments JupyterLab starts up:
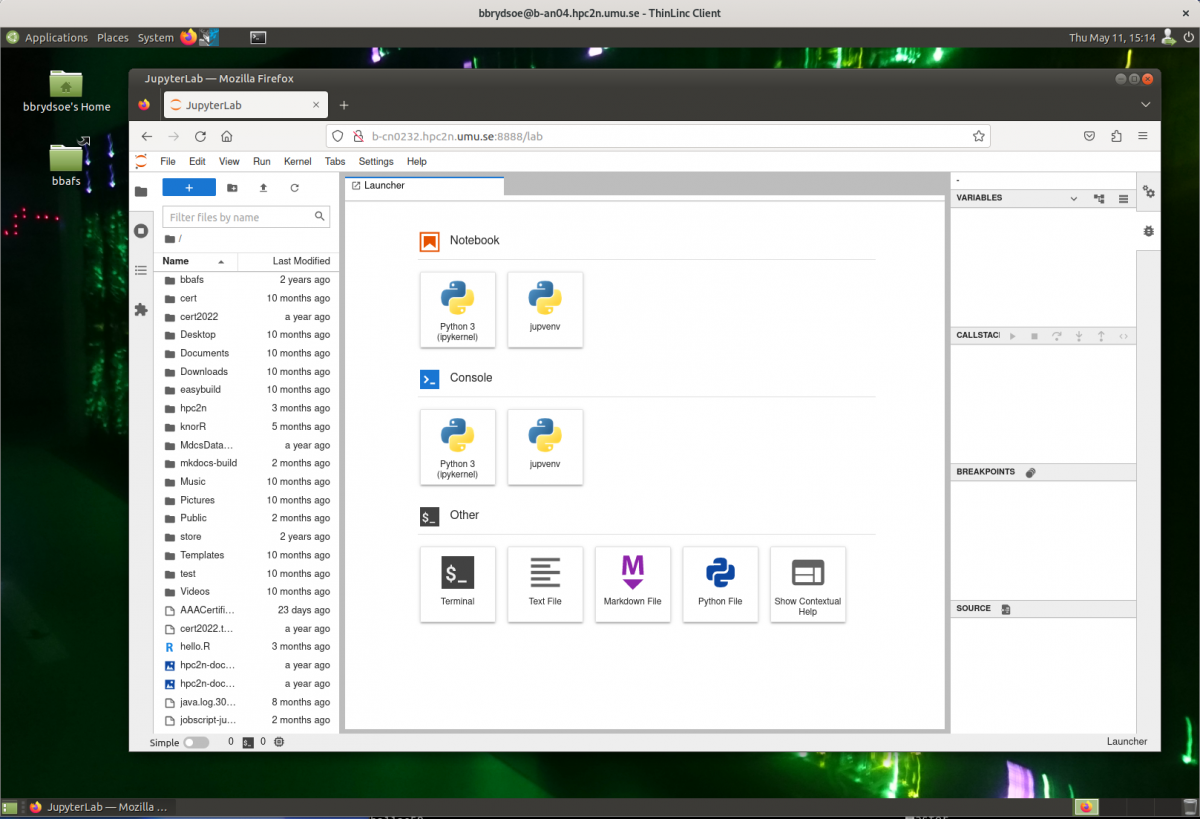
- You shut it down from the menu with “File” -> “Shut Down”
JupyterLab with extra Python packages
Site-installed Python packages
If you need extra Python packages and these packages are already installed at HPC2N as modules, you can just load them. It is easiest to do so before you start the JupyterLab, inside the submit file.
Example batch script, with the SciPy-bundle and matplotlib
Here we load JupyterLab/3.2.8, its prerequisites, the SciPy-bundle (mpi4py, numpy, pandas, scipy etc.) and prerequisites, and also matplotlib. This is how a batch submit file that will run JupyterLab and these extra Python packages might look:
#!/bin/bash
# Here you should put your own project id
#SBATCH -A hpc2nXXXX-YYY
# This example use 1 core
#SBATCH -n 1
# Ask for a suitable amount of time. Remember, this is the time the Jupyter notebook will be available! HHH:MM:SS.
#SBATCH --time=05:00:00

# Clear the environment from any previously loaded modules
module purge > /dev/null 2>&1

# Load the module environment suitable for the job
module load GCC/10.3.0 JupyterLab/3.2.8 OpenMPI/4.1.1 SciPy-bundle/2021.05 matplotlib/3.4.2

# Start JupyterLab
jupyter lab --no-browser --ip $(hostname)
You then submit the batch script, get the url, and open it in a browser, like described in the “simple example” above.
Own-installed Python packages
Running JupyterLab with some own-installed Python packages requires you to use a virtual environment and your own Jupyter kernel. This is not as difficult as it may sound.
We will illustrate this with an example.
Own-installed pyDOE and torch. Using JupyterLab/3.4.2.
- First we need to load the modules that we need for our own-installed packages, and for the JupyterLab.
pyDOEandtorchhave some prerequisites, some of which are already installed at HPC2N. We will start by loading the available prerequisite modules:- We now need to create a virtual environment (venv) to install our own packages in. I am placing it in the Public directory under my home directory ($HOME), but you could (should) instead place it in your project storage. I am calling the venv “jupvenv”, but you can call it whatever you want:
- Activate the venv
- Install
ipykernelin the venv. This is needed to be able to make your own Jupyter kernel which can use the own-installed Python packages.
- NOTE! It may complain of missing prerequisites. If so, instead install:
- Install your Python packages in the venv, here pyDOE and torch
- Install the new kernel in Jupyter (here called
jupvenv)
- Check list of kernels to see your new kernel
- Later you can remove the kernel if you feel like, using this:
- Later you can remove the kernel if you feel like, using this:
- Now make a submit file as before. Something like this should work:
#!/bin/bash # Here you should put your own project id #SBATCH -A hpc2nXXXX-YYY # Here allocating 1 core - change as suitable for your case #SBATCH -n 1 # Ask for a suitable amount of time. Remember, this is the time the Jupyter notebook will be available! #SBATCH --time=05:00:00 # Clear the environment from any previously loaded modules module purge > /dev/null 2>&1 # Load the module environment suitable for the job module load GCC/10.3.0 JupyterLab/3.2.8 OpenMPI/4.1.1 SciPy-bundle/2021.05 matplotlib/3.4.2 # Activate the venv you installed your own Python packages to source $HOME/Public/jupvenv/bin/activate # Start JupyterLab jupyter lab --no-browser --ip $(hostname) - Submit the above submit file (here I named it
MyJupvenv.sh).
- You get the <job-id> when you do the above command.
- Check the Slurm output file (
slurm-<job.id>.out); grab the URL with the hostname as described in the first part of this document, since the localhost one requires you to login to the compute node. - Start a webbrowser within HPC2N (ThinLinc interface). Put in the URL you grabbed, including the token.
- Inside JupyterLab, start the new kernel. Just click the launcher for that one if no other kernel is running.
- If a kernel is running (shown under kernels), then shut down that kernel and click “Kernel” in the menu, and then “Change kernel”. Pick your kernel from the drop-down menu.
- You can now run your files etc. with the own-installed Python packages available.
- NOTE! Sometimes it is still running on the default kernel. If so, Click the 3 little dots in the right side of the editor-window for the program and pick your kernel. Then rerun your files.
JupyterLab with Julia
-
In order to use Julia kernels in a Jupyter notebook, you need to install the IJulia package in Julia. To do so, first load the modules for JupyterLab and Julia.
Example: Loading Jupyterlab/3.2.8 and Julia v. 1.8.5 -
Then, start a Julia session and add the IJulia package. This can be done either in Julian mode:
or in package mode: -
Once this package is installed, write a batch submit file to start a JupyterLab (in batch mode) using this template:
#!/bin/bash # Here you should put your own project id #SBATCH -A hpc2nXXXX-YYY # This example use 1 core #SBATCH -n 1 # Ask for a suitable amount of time. Remember, this is the time the Jupyter notebook will be available! HHH:MM:SS. #SBATCH --time=05:00:00 # Clear the environment from any previously loaded modules module purge > /dev/null 2>&1 # Load the module for JupyterLab - here version 3.2.8 module load GCC/10.3.0 JupyterLab/3.2.8 # Load the Julia module - here version 1.8.5 ml Julia/1.8.5-linux-x86_64 # Start JupyterLab jupyter lab --no-browser --ip $(hostname) -
Submit the above submit file (here I named it
MyJupvenv.sh). -
You get the <job-id> when you do the above command.
-
Check the SLURM output file (
slurm-<job.id>.out); grab the URL with the hostname as described in the first part of this document, since the localhost one requires you to login to the compute node. -
Start a web browser within HPC2N (ThinLinc interface). Put in the URL you grabbed, including the token.
-
Inside JupyterLab, start the new Julia kernel. Just click the launcher for that one if no other kernel is running. Notice that besides the Julia version 1.8.5, other options are provided for the kernel of Julia but only the one that matches the loaded module in step 1 will be available.
-
If a kernel is running (shown under kernels), then shut down that kernel and click “Kernel” in the menu, and then “Change kernel”. Pick your kernel from the drop-down menu.
-
You can now run your files etc. with the Julia kernel.
-
NOTE! Sometimes it is still running on the default kernel. If so, Click the 3 little dots in the right side of the editor-window for the program and pick your kernel. Then rerun your files.
JupyterLab with R
- In order to use R kernels in a Jupyter notebook you need to install a suitable kernel, for instance the IRkernel.
- First load the modules for JupyterLab and a compatible R version with the same tool chain, at this moment (spring 2024) the following combo works:
- Then, start an R session on the command line and install the IRkernel (choose a location, CRAN, for instance Sweden):
- Once this package is installed, write a submit file to start a JupyterLab (in batch mode) using this template:
Example, loading JupyterLab/4.0.5, its prerequisites, and the R version 4.3.2:
#!/bin/bash # Here you should put your own project id #SBATCH -A hpc2nXXXX-YYY # This example use 1 core #SBATCH -n 1 # Ask for a suitable amount of time. Remember, this is the time the Jupyter notebook will be available! HHH:MM:SS. #SBATCH --time=05:00:00 # Clear the environment from any previously loaded modules module purge > /dev/null 2>&1 # Load the modules for the R and JupyterLab module load GCC/12.3.0 R/4.3.2 module load OpenMPI/4.1.5 JupyterLab/4.0.5 # Start JupyterLab with the installed kernel jupyter lab --no-browser --ip $(hostname) - Submit the above submit file (here I named it
MyJupvenv.sh).
- You get the <job-id> when you do the above command.
- Check the SLURM output file (
slurm-<job.id>.out); grab the URL with the hostname as described in the first part of this document, since the localhost one requires you to login to the compute node. - Start a webbrowser within HPC2N (ThinLinc interface). Put in the URL you grabbed, including the token.
- Inside JupyterLab, start the new R kernel. Just click the launcher for that one if no other kernel is running.
- If a kernel is running (shown under kernels), then shut down that kernel and click “Kernel” in the menu, and then “Change kernel”. Pick your kernel from the drop-down menu.
- You can now run your files etc. with the R kernel.
- NOTE! Sometimes it is still running on the default kernel. If so, Click the 3 little dots in the right side of the editor-window for the program and pick your kernel. Then rerun your files.